🧥 Armament
Adds the ability to create configurable custom armors using resource packs.
🎧 Key Features
| Feature | Description |
|---|---|
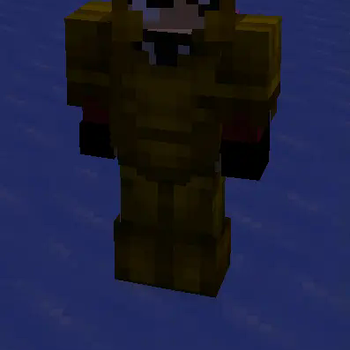
| 🛡️ Custom Armor Sets | Easily add your own armor sets to Minecraft. |
| ⚡ Performance Optimization | Built to ensure smooth server performance. |
| 💡 User-Friendly | Simple commands for reloading configuration and giving armor to players. |
| ⚙ Configurable | Manage your custom armors via a straightforward armors.yml file. |
| 🎨 Resource Pack Generation | Automatically generate a resource pack from your configuration. |
| 🔃 Cross-Version Compatibility | Supports Minecraft versions from 1.20 to the latest. |
| 🖼️ GUI Interface | Browse and select custom armor sets through an intuitive GUI. |
💻 Available Commands
| Command | Description |
|---|---|
/armament reload |
Reload the plugin's configuration without a server restart. |
/armament give <armor_name> <piece> [player] |
Grant a custom armor piece to a player. |
/armament giveset <armor_name> [player] |
Grant a full custom armor set to a player. |
/armament gui |
Open the GUI to browse and select custom armor sets. |
🔒 Permissions
| Permission | Description |
|---|---|
armament.admin |
Grants access to all admin commands. |
📩 Installation Steps
-
Download Armament:
- Get the latest version from Modrinth.
-
Install:
- Place the
.jarfile into your server'spluginsdirectory. - Example:
/plugins/Armament-x.x.x.jar
- Place the
-
Activate:
- Restart your server to load the plugin.
-
Customize:
- Edit the
armors.ymlfile located inplugins/Armament/armors.ymlto add your custom armor sets. - Example configuration:
armors:
  epic:
    custom_model_data: 1
    helmet:
       name: "&6Epic Chestplate"
       lore:
       - "&7Custom Epic Lore!"
    chestplate:
       name: "&6Epic Chestplate"
       lore:
       - "&7Custom Epic Lore!"
    leggings:
       name: "&6Epic Leggings"
       lore:
       - "&7Custom Epic Lore!"
    boots:
       name: "&6Epic Boots"
       lore:
       - "&7Custom Epic Lore!"
- Edit the
-
Add Resources:
- Place your custom armor textures in the
source_filesdirectory:- Armor layers:
source_files/layer_files/ - Armor display items:
source_files/item_files/
- Armor layers:
- Place your custom armor textures in the
-
Load Resource Pack:
- Upload the generated resource pack to mc-packs.net.
- Update the
server.propertiesfile:Property Value resource-packURL to resource pack resource-pack-sha1SHA1 hash of the resource pack require-resource-packtrue - Note: If you're using an existing resource pack, merge it with the Armament resource pack.
🎨 Creating Custom Armor Textures
To create custom armor textures for Armament:
-
Open the Template:
- Locate the
armor_model.bbmodelfile in src/main/resources. - Open this file in BlockBench to get an understanding of the armor structure.
- Locate the
-
Customize the Model:
- Ensure your model adheres to Minecraft's armor structure.
-
Export Textures:
- Export your custom armor textures.
-
Prepare Texture Files: The plugin requires specific naming conventions for the texture files:
a) Layer Files (Required): In
source_files/layer_files/:armorName_layer_1.png: For helmet, chestplate, and bootsarmorName_layer_2.png: For leggings
b) Item Files (Optional, based on armors.yml): In
source_files/item_files/:armorName_helmet.pngarmorName_chestplate.pngarmorName_leggings.pngarmorName_boots.png
Replace
armorNamewith the name of your custom armor set as defined inarmors.yml. -
Place Textures:
- Put the armor layer textures (
*_layer_1.pngand*_layer_2.png) insource_files/layer_files/. - Put the display item textures (e.g.,
*_helmet.png) insource_files/item_files/.
- Put the armor layer textures (
-
Update Configuration:
- In
armors.yml, reference your new textures using the appropriate armor name. - Ensure the armor name in the configuration matches the prefix used in your texture file names.
- In
Note: The item files (helmet, chestplate, leggings, boots) are optional and depend on your armors.yml configuration. If you define a specific armor piece in the config, make sure to provide the corresponding item texture.
📞 Support
For assistance, visit the GitHub Repository or join our Discord Server.
📜 License
Armament is released under the Apache License 2.0.
🤝 Partner

Use code FURQ for 15% off your order!